SPRING INITIALIZR를 활용한 일반적인 CNA 구현
이번 시간은 이벤트스토밍 결과를 Cloud Native Application(CNA) 구축 시 많이 적용되는 Spring Boot(스프링 부트)와 EventDriven 방식을 사용하여, 실제 코드로 변환하는 실습을 진행합니다.
로컬에서 테스트하기 위해 HTTP Client 툴을 먼저 설치합니다.
1. 스프링 부트를 처음 시작할 때 가장 좋은 방법은 스프링 부트 에서 시작하는 것입니다. 브라우저에서 다음 사이트를 접속하여 스프링 부트를 시작합니다.
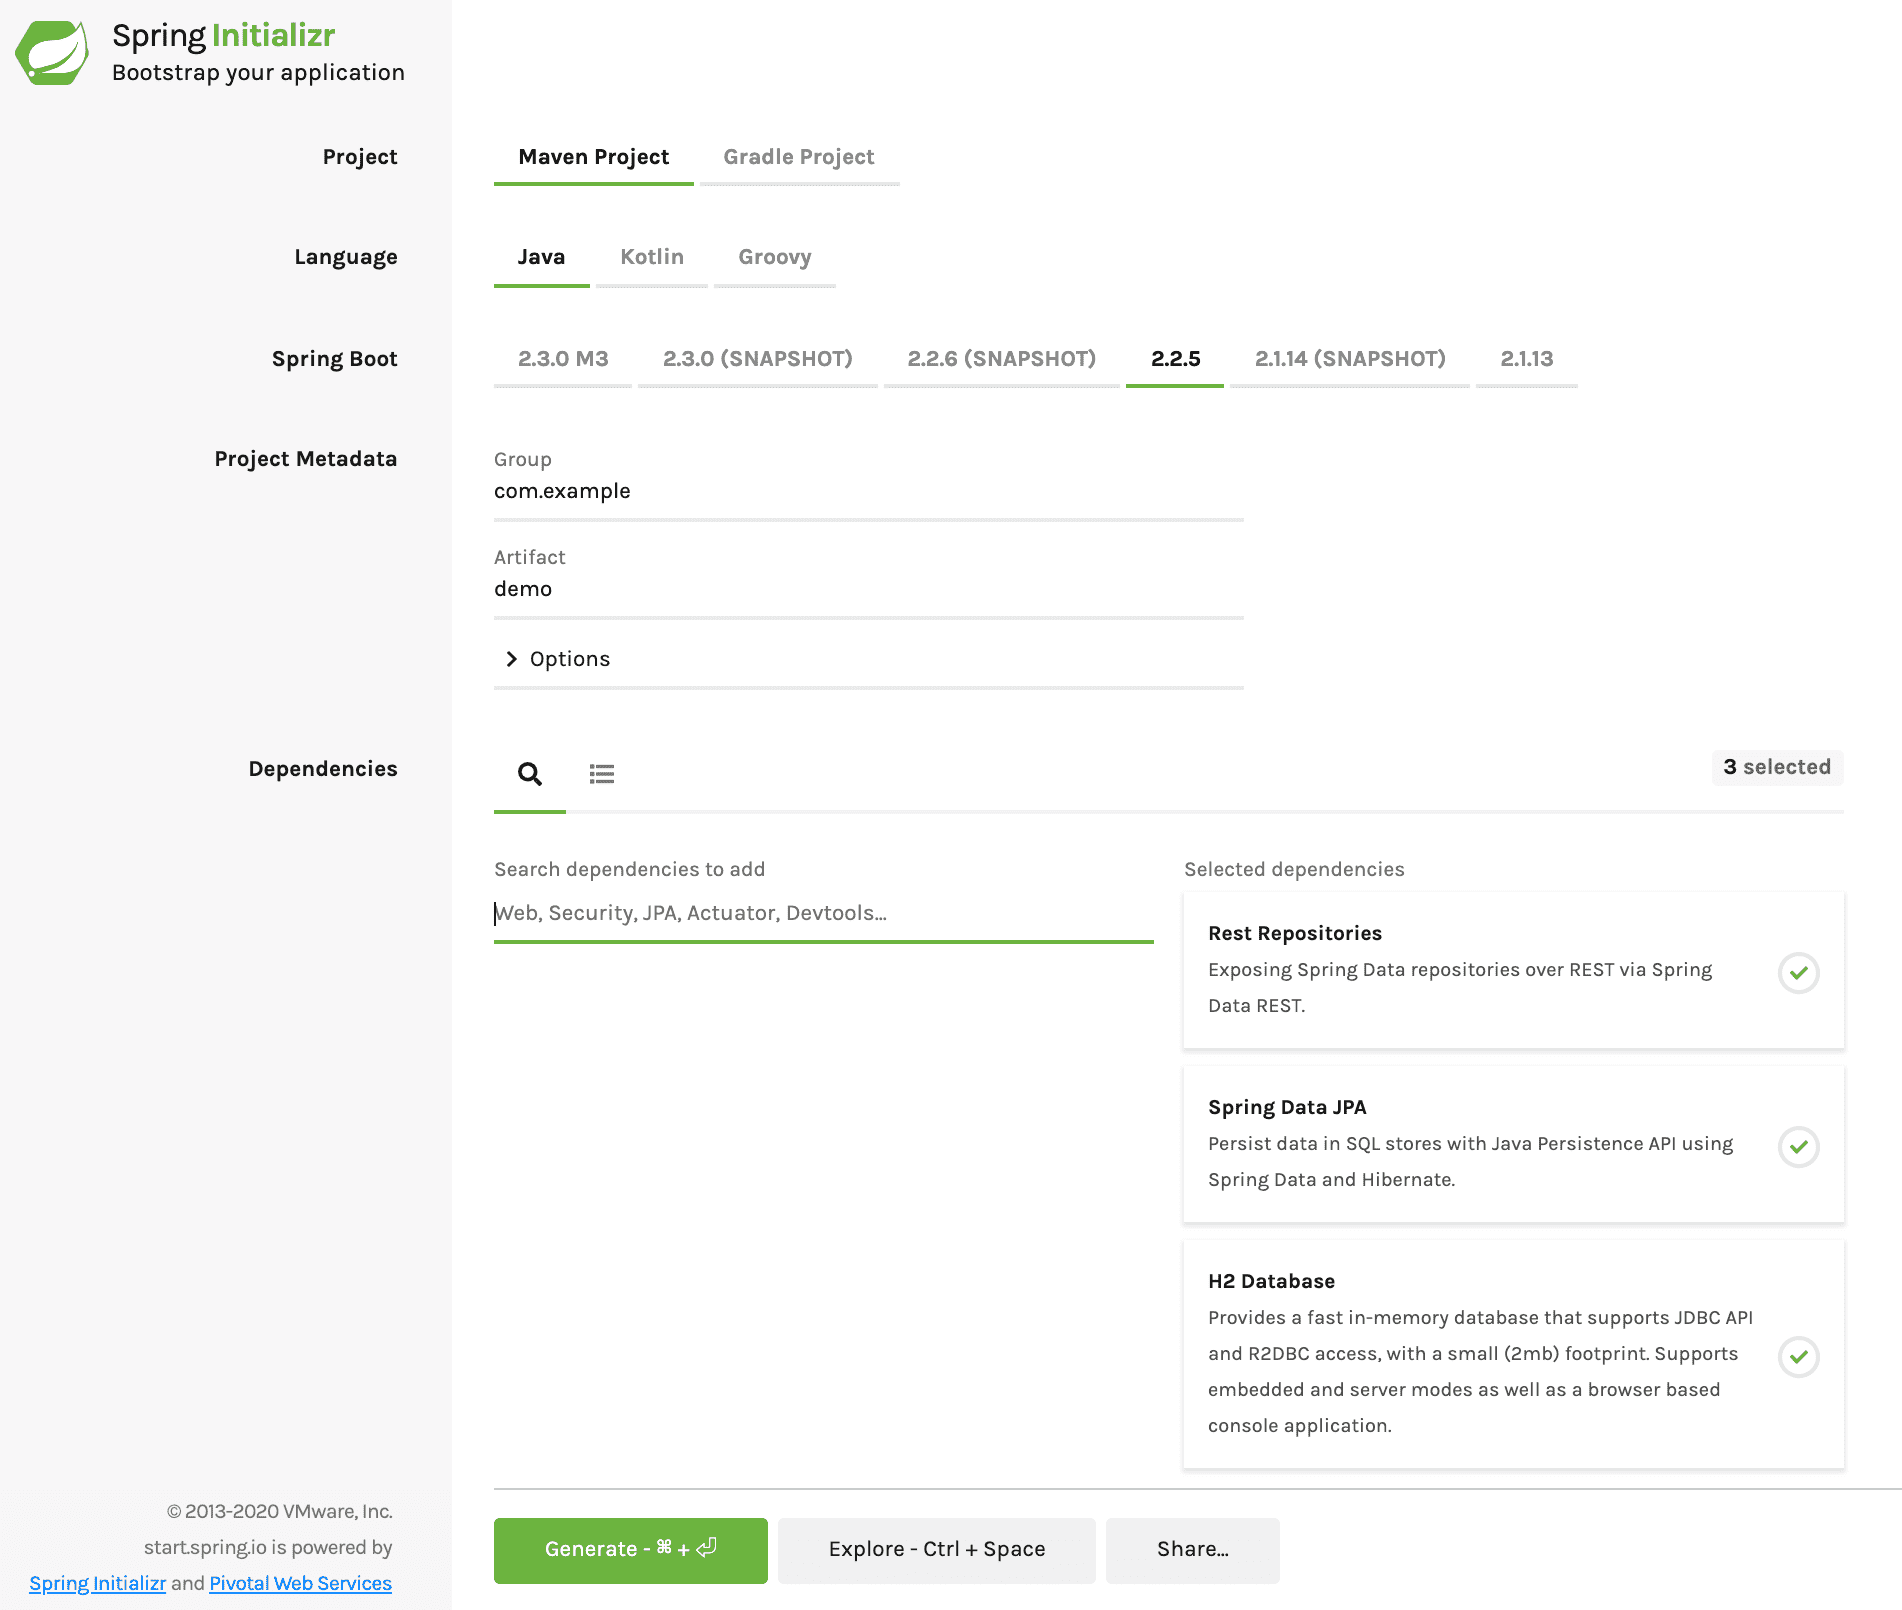
2. Maven Project 와 Java 를 선택하고, 디펜던시(Dependencies)에 다음을 추가하여 Generate 버튼으로 다운로드 받은 후, 로컬 IDE(VS Code)에 프로젝트를 로드 합니다.
- Rest Repository : 레파지토리 패턴을 통해 CRUD API를 생성해 줍니다.
- Spring Data JPA : Java Persistence API의 약어, 자바 ORM 기술에 대한 표준 명세로 API 기반 영속성 관리 도구
- H2 : Java 기반 오픈소스 인메모리 DB
3. 먼저, Aggregate 를 생성 합니다.
- Aggregate 는 이벤트 스토밍의 노란색 결과 입니다.
- Product Class 를 생성 합니다.
- 상품 Entity 를 id, name, stock 맴버 변수를 가진 정의하고 get,set 메서드를 생성하여 줍니다.
- 클레스 상단에
@Entity 어노테이션을 달아서 Aggregate 선언을 하여 줍니다.
@Entity 어노테이션은 JPA 방식을 사용합니다. 이는 Id 값이 필수입니다.- id 로 선언한 변수에
@Id @GeneratedValue 를 선언하여 줍니다.
@Entity
public class Product {

    @Id @GeneratedValue
    Long id;
    String name;
    int stock;

    // get/set 메서드
}
4. Command 를 생성 합니다.
- ProductRepository interface 를 생성하여 줍니다.
- CrudRepository<Product, Long> 를 extends 하여 줍니다.
- CrudRepository<> 의 두개의 변수는 Entity Type과 Primary Key(Entity Id) Type 입니다.
- 위와같이 선언만 하면, Entity 의 Repository 패턴이 자동 생성되어, Product 엔터티의 CRUD에 해당되는 API 가 자동으로 생성이 됩니다.
public interface ProductRepository extends CrudRepository<Product, Long> {

}
5. Repository 패턴을 사용하여 Product 엔터티의 기본 라이프 사이클 (CRUD) 를 실습하여 봅니다.
- 스프링 부트를 실행 하는 방법은 mvn spring-boot:run 입니다.
- 메이븐 명령어로 spring-boot 라는 플러그인의 run 명령어를 실행 합니다.
- spring-boot 플러그인은 pom.xml 파일에 설정되어 있습니다.
    <build>
		<plugins>
			<plugin>
				<groupId>org.springframework.boot</groupId>
				<artifactId>spring-boot-maven-plugin</artifactId>
			</plugin>
		</plugins>
	</build>
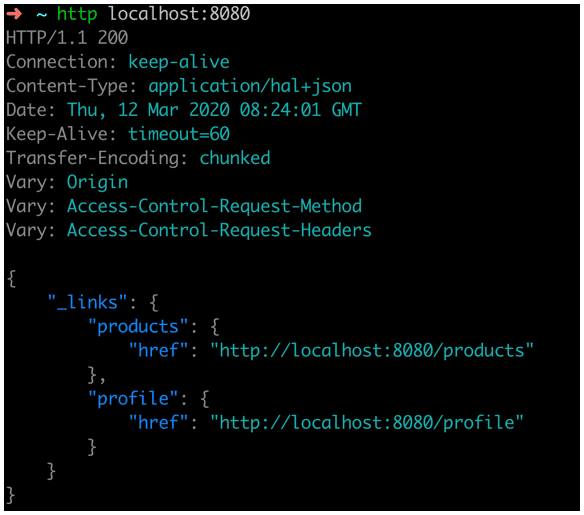
- 실행시 기본 포트인 8080 으로 실행됩니다.
- http 명령으로 localhost:8080 을 호출하여 봅니다.
- Spring Cloud Streams Application에서 Kafka 바인더를 사용하기 위하여 다음 라이브러리를 pom.xml 에 추가합니다.
<!-- kafka streams -->
<dependency>
    <groupId>org.springframework.cloud</groupId>
    <artifactId>spring-cloud-starter-stream-kafka</artifactId>
</dependency>
<dependency>
    <groupId>org.springframework.boot</groupId>
    <artifactId>spring-boot-starter-actuator</artifactId>
</dependency>
- spring cloud 는 spring-boot 와 버전에 대한 종속성이 있습니다. 그리하여 각각의 spring-cloud 프로젝트 별로 버전을 직접 명시하지 않고, 종속성을 선언하는 를 사용하여야 합니다.
- 아래와 같이 를 pom.xml 에 추가하여 줍니다.
<dependencyManagement>
    <dependencies>
        <dependency>
                <groupId>org.springframework.cloud</groupId>
                <artifactId>spring-cloud-dependencies</artifactId>
                <version>${spring-cloud.version}</version>
                <type>pom</type>
                <scope>import</scope>
        </dependency>
    </dependencies>
</dependencyManagement>
- pom.xml 에서 ${} 로 시작하는 부분은 변수(properties) 처리를 하겠다는 의미입니다. 상단의 부분에 위에서 변수처리함 <spring-cloud.version> 를 추가하여 줍니다.
- 여기서 버전을 명시할때 주의할 점은 Spring-boot에 매핑되는 Spring-cloud 버전을 사용해야 합니다.
- 매핑되는 버전 정보는 스프링 클라우드 Site에서 확인 할 수 있습니다.
spring-cloud 의 Release Trains 참고
<properties>
    <java.version>1.8</java.version>
    <spring-cloud.version>Hoxton.SR3</spring-cloud.version>
</properties>
- DemoApplication.java 파일에 스트림을 바인딩 합니다.
- @EnableBinding(Processor.class)
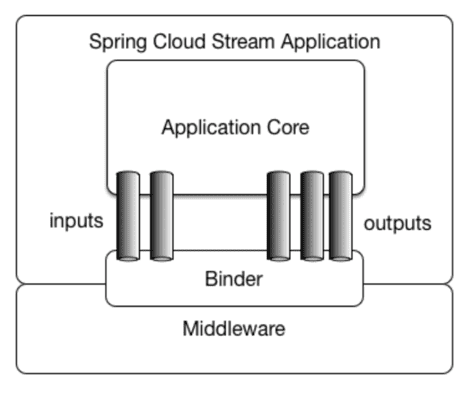
- streams 은 메세지의 흐름으로 input 메세지와 output 메세지가 존재합니다.
- Processor 방식은 input 과 output 을 모두 사용하는 방식입니다.
import org.springframework.boot.SpringApplication;
import org.springframework.boot.autoconfigure.SpringBootApplication;
import org.springframework.cloud.stream.annotation.EnableBinding;
import org.springframework.cloud.stream.annotation.StreamListener;
import org.springframework.cloud.stream.messaging.Processor;
import org.springframework.context.ApplicationContext;
import org.springframework.messaging.handler.annotation.Payload;

@SpringBootApplication
@EnableBinding(Processor.class)
public class DemoApplication {
public static ApplicationContext applicationContext;
public static void main(String[] args) {
applicationContext = SpringApplication.run(DemoApplication.class, args);
}
}
- stream 을 kafka 와 연결하기 위하여 application.yaml 파일에 아래 설정을 추가 합니다.
- kafka brokers로 localhost:9092 를 사용한다는 의미입니다. 카프카 설치시 기본 포트가 9092 입니다.
- bindings.input 과 bindings.output 은 기본 채널입니다. 만약 채널명을 변경 하고 싶으면 Processor 를 새로 만들어야 합니다.
KafkaProcessor.java
- destination 은 목적지라는 뜻인데, kafka 에서는 topic 이름이 됩니다.
- 즉, 해당 설정은 shop 이라는 토픽에 메세지를 주고 받겠다는 의미입니다.
spring:
  cloud:
    stream:
      kafka:
        binder:
          brokers: localhost:9092
      bindings:
        input:
          group: product
          destination: shop
          contentType: application/json
        output:
          destination: shop
          contentType: application/json
9. 이벤트를 kafka 에 발송
- 좀전에 수정하였던
@PostPersist 부분에 스트림 메세지를 발송하는 부분을 수정합니다.
- 라이브러리 임포트
import org.springframework.cloud.stream.messaging.Processor;
import org.springframework.messaging.MessageChannel;
import org.springframework.messaging.MessageHeaders;
import org.springframework.messaging.support.MessageBuilder;
import org.springframework.util.MimeTypeUtils;
- Spring 에서 Bean으로 등록되지 않은 객체에서 Bean 객체를 사용하기 위해 @Autowired 대신, 직접 applicationContext 에서 getBean으로 참조합니다.
@PostPersist
public void eventPublish(){
ProductChanged productChanged = new ProductChanged();
productChanged.setProductId(this.getId());
productChanged.setProductName(this.getName());
productChanged.setProductStock(this.getStock());
ObjectMapper objectMapper = new ObjectMapper();
String json = null;

try {
json = objectMapper.writeValueAsString(productChanged);
} catch (JsonProcessingException e) {
throw new RuntimeException('JSON format exception', e);
}

Processor processor = DemoApplication.applicationContext.getBean(Processor.class);
MessageChannel outputChannel = processor.output();

outputChannel.send(MessageBuilder
.withPayload(json)
.setHeader(MessageHeaders.CONTENT_TYPE, MimeTypeUtils.APPLICATION_JSON)
.build());
}
- 수정 후 서비스를 재시작한 다음 REST API로 상품 등록 시, 카프카에 이벤트 메시지가 도달하는지 확인 합니다.
- 메시지는 Kafka Consumer로써 shop 토픽(topic) 모니터링으로 확인 가능합니다.
- http POST localhost:8080/products name=‘TV’ stock=10
- [kafka 설치폴더]/bin/windows/kafka-console-consumer --bootstrap-server localhost:9092 --topic shop --from-beginning